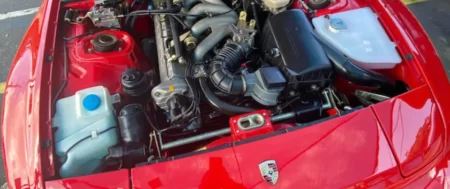

The engine bay of a vehicle is an area often overlooked when cleaning or detailing. While it does not necessarily impact your daily experience, there are some serious benefits (and joys) to keeping this on your quarterly checklist.
Now let’s pop the hood and talk detailing.
Many cars from the past few decades have an assortment of plastic coverings under the hood. This gives a clean presentation but also diminishes some joy of popping your hood to show off that powerful engine you love. However, there are still ways to make it look gorgeous and show-worthy, even if a shined up and exposed big block V8 is not in view.
Before we dive into the process, it is important to eliminate any concern about this kind of cleaning. Everyone has heard at least one story about a person cleaning their engine bay with a hose and the car dramatically dying due to their ignorance.
While you need to be aware of exposed electrical connections, fuse boxes, and filters, most newer vehicles are buttoned up nicely and safe from extreme damage from liquids. Manufacturers have been using water resistant weather-pack connectors for years and things like batteries and alternators have been designed to live in the harsh elements of an engine bay.
Heck, the alternator on one of my vehicles is mounted near the bottom of the engine and exposed to the bottom of the engine bay. Every time the car is driven in the rain the alternator gets wet. In fact, most of the engine bay gets wet to some degree. You really don’t have to worry much unless your car is very old.
Table of Contents [show]
Preparation and Protection.
Before grabbing any kind of cleaning product, your first step will be to prepare the engine bay for cleaning. This is not a complicated process but as with all things, taking your time and doing it correctly will save you many headaches down the line.
The first step that will make your entire process go smoothly is to allow the engine to run for a couple minutes. You want to be cleaning with a warm (but not hot) engine, as the cleaning products will emulsify warm oils easier but will dry up too quickly if the surfaces are hot to the touch.
Now that your engine is slightly warm, you will need to source the following:
- Plastic Bags
- Rubber Bands
- Painter’s Tape
The above list will be your coverings, wrappings and securing tools for protecting delicate areas under the hood. Due to the engine bay having some exposed electrical components that don’t enjoy moisture, we’re going to cover up the essentials. While this does not need to be a photoshoot-worthy wrapping job, you may want to seal up or cover the following areas: - Alternator
- Coil Packs and Wires
- On-Board Diagnostics (OBD) Port
- Exposed Filters
- Air Intake
- Headlights Connectors
- Misc Electrical Plugs
Be sure that all bags or wraps have any openings facing down; we don’t want to have pools of water or cleaner leaking in those areas. Once you have these and any other noticeably exposed wires covered, do one last look over the entire engine bay. Do you see any electrical connectors or exposed wires? If nothing that resembles a connector or plug is showing, you’re good to go.
If you have a newer vehicle you can choose to forgo the coverings and simply be gentle with your spraying of water around the above listed items.
Degrease and Clean
Now that you have properly covered up all temperamental electrical areas, you are ready to begin cleaning. Spray the entire engine bay with an all-purpose engine cleaner, such as Chemical Guys Signature Orange Degreaser. It is made specifically for removing stains and grease without being corrosive (something you need to think about if you have polished aluminum parts in your engine bay).
Whichever your cleaner of choice, cover the entire engine bay but holding back from spraying electrical connectors, battery terminals or the alternator directly. While they are now covered nicely, it’s better to be safe around these expensive components.
Allow the cleaner to sit for 3-5 minutes, allowing the dirt and other grease to loosen.
If your engine bay is really bad, it may help to agitate the cleaner on the surfaces that you can reach using a rag, brush, or wash mit.
If your engine bay has oil, power steering, or other fluid leaks you may need to followup the APC (after rinsing so as not to mix chemicals) with a full strength degreaser such as Gunk Engine Degreaser.
Spray
It’s time for the big reveal. Some detailers will say using a pressure washer will give you the best results, but a softer touch will lean towards the safer side and likely give you similarly effective results. Grab a hose with a regular nozzle and with medium pressure hose down the engine bay. You are targeting all the cleaner, while remembering to avoid knocking off your plastic coverings as you go.
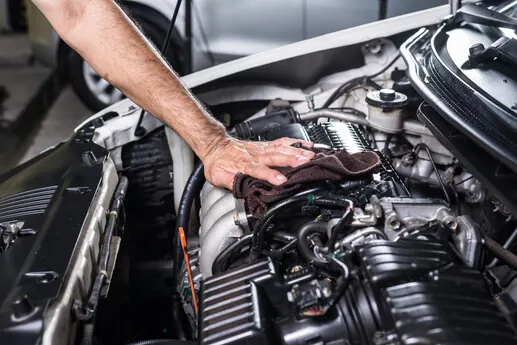
Once the cleaner has been removed, you may notice there are some finer areas that still require cleaning. This is normal for some built-up grime or simply tighter areas. Utilizing a tool such as the EZ Detail Brush Little, a horse hair detailing brush, or a similarly soft non-abrasive brush, move through those areas with a quick spray of your engine cleaner and some methodical scrubbing.
If you are after professional results and have really tight areas that you can’t get to with typical detailing brushes you can opt for some twisted pipe cleaners or something like these generic swabs to aid in cleaning.
Spray the engine bay down one last time with clean water. These additional minutes of work will pay off in the end!
Dry
The dirt and grime has been removed and now it is time to dry it all down. This would be a great opportunity to use a car drying blower such as the Metro Blaster Sidekick, which you can read in my article The Best Blowers for Drying a Car. Simply blow the water out with the blower.
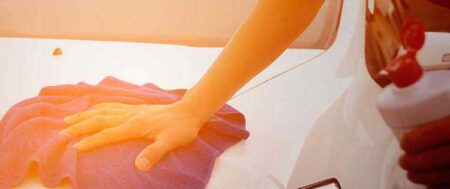
Once the blow dry is finished grab a clean microfiber towel and move through the engine bay, wiping down one section at a time. This is the time when you can clean off any extra cleaner left from the original cleaning or the additional spot-cleans.
Clean Up
You’re now safe to remove all your plastic coverings, noticing if any minor touch-ups need to happen with the cleaner around these areas. Just use common sense here and be gentle with the cleaner and brushes.
Shine
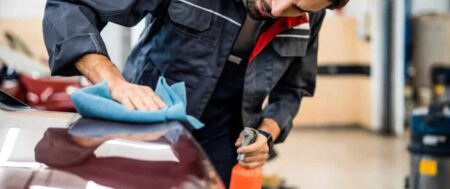
While the entire engine bay is perfectly clean, there is one more step that can really bring things to the next level. Much like the wax after a fresh wash of your exterior paint, giving the plastic and metals under the hood a good shine will go a long way.
Depending on your preference, there are a variety of protectants and plastic dressings that will give you excellent results. One quality option for a matte finish and serious protection is 303 Aerospace Protectant. This will give you that nice deep black new plastic look if you are one to enjoy popping your hood at the local Cars and Coffee.
Spray your protectant of choice on all surfaces (note that your electrical connectors, battery and alternator are still covered) and wipe off thoroughly. This will expose a wonderful shine and deeper shade to your plastics, while providing a protective layer to all surfaces.
For the metals, Mothers Mag and Aluminum Polish on a clean microfiber towel will work great to bring back the luster and uniform appearance. This polish is great on wheels as well so it won’t go to waste.
Don’t forget to address the visible body areas as well such as the under side of the hood, fender humps, and firewall. Most cars leave the factory with just the base coat of paint sprayed to these areas. There is no clear coat to polish. In fact it’s really easy to rub through these areas and reveal primer or metal below. In this circumstance you can skip to using a quality paint sealant to gloss up and protect those areas.
Finishing
Now take a step back and enjoy the sight of a magnificently clean and refreshed engine bay. Granted there are some genuine benefits to this process: fluid leaks are easier to spot and selling a car with a meticulous engine bay can be far easier.
In the end though, gearheads and detailers alike will tell you that a detailed car will run better and happily take care of its owner in return. While that may be superstitious, I’d like to think the car gods smile down on those of us who look after our vehicles.
Happy detailing!
#cars #calgary #cleaning #carwash #canada #ceramiccoating #appointment #alberta #carwash
We accept the following payments Methods: Debit, Credit card, E-transfer, Cash.
Call/text us for booking:
🌐 www.macdetailz.com
🕹 4335 Manhattan Rd SE, Calgary, AB. T2G 4B1.
☎️ +14034029804