Here is the RallyWays complete professional car detailing step by step process. Following these detailing steps carefully will yield pro results every time.
This process is proven and used by many car detailing professionals. This is the same process we use when detailing anything from a truck, to a daily driver, to a super car.
The graphic below presents the process in a very easy and straightforward step by step list. Keep reading past the graphic for more in depth text explaining each step a bit further. Don’t forget to share with your friends, your favorite forum or on your own blog. Here we go.
Now let’s look at each car detailing step in a little more detail
Wash – Wash vehicle using the 2 bucket method to avoid scratching your paint. Since you will be sealing and waxing, you can strip off old wax using dishwashing soap. If you decide an engine compartment detail is needed, do this first.
Dry – Dry your car using a blower. Anytime you can avoid touching the paint you reduce the chances of adding scratches and swirls. If a blower is not available dry the vehicle using 2 big and thick microfiber towels. One for the initial drying, the other to take care of anything that’s left.
Clay – Clay the car using a good quality, clean and new clay bar. Make sure to use plenty of clay bar lubricant. Quick detailer usually works well for this. Remember, you should also clay the windows, headlamps and tail lamps. Same thing goes for the door jambs. Be thorough.
Prep – Wipe each section you clay down to remove any residue. A good idea is to further clean the paint of any residue with a post-clay sprits. Some people like to wash again after claying.
Inspect – At this stage you must decide if the paint needs correction or swirl removal. A dedicated Xenon or powerful LED detailer’s lamp comes in handy at this stage to help you see any imperfections in the paint and locate swirls.
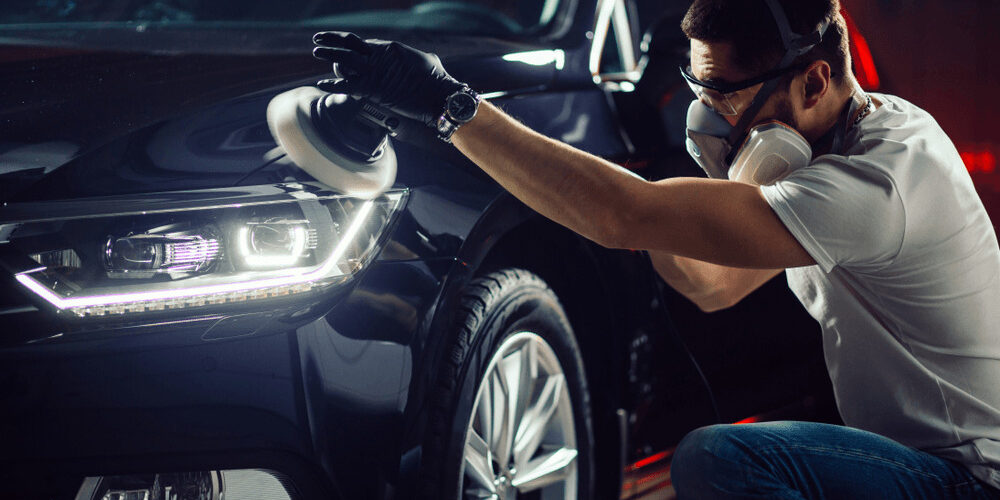
Polish – If you decide paint correction is needed, this is the part where the orbital buffer comes out. Depending on the paint type and how much work it needs, you need to choose your compounds and buffing pads accordingly.
Protect – Once the paint correction is done, or if you simply skipped over the last step, it’s time to protect the paint. You can go straight to layering carnauba wax, or you can use a polymer paint sealant first. The polymer sealant can be the sole protection, but some people like to layer carnauba on top of the sealer. It’s a good idea to let the sealant / wax cure for 12 hours between layers. For a weekend-only car, or a show car, layering carnauba alone is fine. For a daily driver, paint sealant is best because it lasts much longer.
Inside – At some point during the process you need to clean and protect the interiors. A good idea is to do this while you wait for a wax layer to cure. A good vacuum and carpet shampoo can go a long way depending on how dirty the interior is. Use a good quality interior trim protectant that does not leave a sticky residue or is overly shiny.
Fabric – Leather seats require care during the interior detailing stage. Use a high-quality leather cleaner, but spot-check for color fastness first. After the leather has been cleaned and has dried, finish it off with leather conditioner. Keep in mind that some leather conditioners don’t play well with vinyl or pleather. Identify what type of leather you have. Many times seats have sections of real leather along with sections of vinyl. If you have cloth seats, clean and protect accordingly.
Wheels – For the full effect, a great idea is to remove the wheels and clean them inside out. After cleaning, you can use older detailing clay to prep the wheels. Note, never use that clay on paint again. Using a polymer sealer for the wheels will help keep them clean longer. At this point you should also dress your tires.
Glass – For the windows, headlamps and tail lights you clayed earlier, you can now treat them with a good, non-abrasive sealer recommended for glass and shiny hard plastics. Using the right products will add UV protection, make the surface slick and help keep them clean from the weather, road grime and bugs.
Details – Tiny details go a long way. Take the time to seal and wax the door jambs as well as the edges under the hood and trunk – the hidden areas you clayed. Sealing these hidden painted surfaces is a great idea as they will stay clean longer. Plus wax in these hidden areas lasts a long time. Using a rubber and plastic protectant for exterior trim is a good idea. Be careful not to get any on the paint.
Tips
- Make sure not to cross-contaminate surfaces. Microfiber towels should not be mixed between products or surfaces – even after they have been washed. Also make sure you have plenty of them.
- Use painter’s tape to mask off trim to avoid getting wax and sealant on it. Most waxes don’t play well with plastics and rubbers. This is specially useful if you are layering wax using an orbital buffer since you can’t be as precise around the edges as you can by hand.
- An intensive detail job like this can take anywhere between 16-40 hours depending on whether paint correction is needed.
That’s it! Follow each of these steps and you too can have professional results in all your car detailing projects. Don’t forget to share this graphic on your favorite car forum or your blog using the embed code below the graphic. You can also share to your favorite social media network using the buttons below.
#cars #calgary #cleaning #carwash #canada #ceramiccoating #appointment #alberta #carwash
We accept the following payments Methods: Debit, Credit card, E-transfer, Cash.
Call/text us for booking:
🌐 www.macdetailz.com
🕹 4335 Manhattan Rd SE, Calgary, AB. T2G 4B1.
☎️ +14034029804


